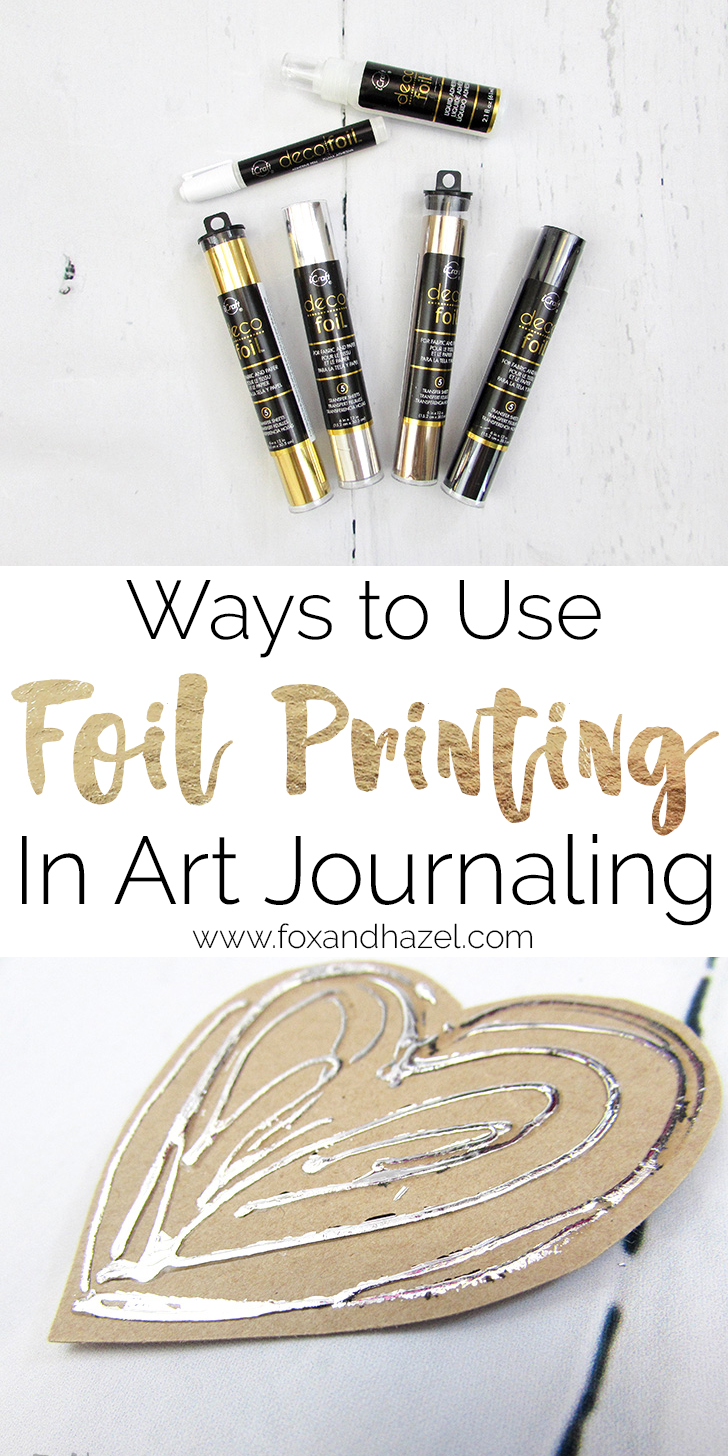
If you’re on Instagram or Pinterest and follow any hand lettering/calligraphy accounts, then you know that foiling is all the rage right now. It looks SO satisfying, doesn’t it? I’m not much of a calligraphy buff, but once I saw this stuff I immediately wanted to use figure out how to apply foil printing to art journal pages.
I decided to try some drawings to use as embellishments in some future pages. Before I go any further, I will note that the pen is supposed to be used with a laminator in order to adhere the foil to where the adhesive is. I didn’t realize this when I bought the pen, and frankly, as soon as I read it on the package I was immediately going “UGH.” Because pulling out my laminator is a pain in the butt. However, the package also says that you can use a die-cutting machine like a
Big Shot or
Cuttlebug too. Which means that the heat isn’t a requirement to foil – you simply need pressure to get it to adhere. I’m sure the heat from a laminator helps too, but it seems like they’re utilizing the rollers to apply pressure mostly. SO, instead of having to pull out a machine, I figured I could do the same if I used a
paint brayer on a hard surface. Genius!
After I had written with the pen and let it dry for a minute, I just laid the foil sheet on top and used my paint brayer to firmly press the foil on.
As you can see, it worked pretty good! My edges are not nearly as crisp as they would be if I used a laminator, but I’m okay with the finished result. I lean to the side of grunge and imperfect when it comes to my work. Also, I will happily take it if it means avoiding pulling out my laminator whenever I want to use the adhesive pen!
Next, I tried making some embellishments using the Adhesive Liquid. This worked a lot better, which makes sense since the liquid adhesive is meant to be used without a laminator. It can also be used on fabrics, wood, etc so the possibilities are greater.
You do have to let the adhesive dry for a while before applying the foil. When it’s dry it’s clear and tacky for the foil to stick to. The bottle says 1-2 hours, but I found that after 20-30 min on paper that the adhesive was dry enough to go ahead. I’m sure the drying time is dependent on how porous your material is and how humid your location is.

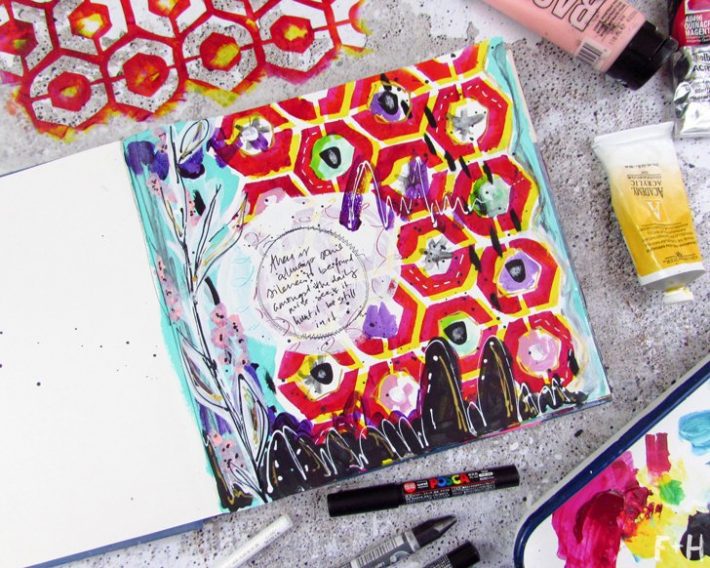
Look at all that shiny goodness! It’s soooo satisfying! After all that, I decided to try the foil directly onto some art journal pages. I used the adhesive liquid and brushed it on with a paintbrush. Unlike the adhesive pen, the liquid just requires you to rub the foil sheet over the top of the dried adhesive. My first attempt didn’t go as well as I hoped.
I didn’t let the adhesive dry long enough, and I also didn’t apply it thick enough either. Paper and paint are absorbent, so I found that I needed to apply a thicker layer of adhesive for it not to get completely soaked into the paper. The paper was also really textured so the foil only stuck to the high spots where there was more pressure from rubbing. It does give a really cool grungy/distressed vibe, which I like! But I wanted more of a brushstroke texture on the page. I tried it again on a page with less texture. My second go was a lot more successful!
All dat shiny goodness! I can’t stop now – I am obsessed with adding foil printing to art journal pages. My subconscious rule of thumb is that no page is complete until there is something metallic or shiny on there (it’s like a sickness.) So foiling totally appeals to my love of metallics and shiny stuff.
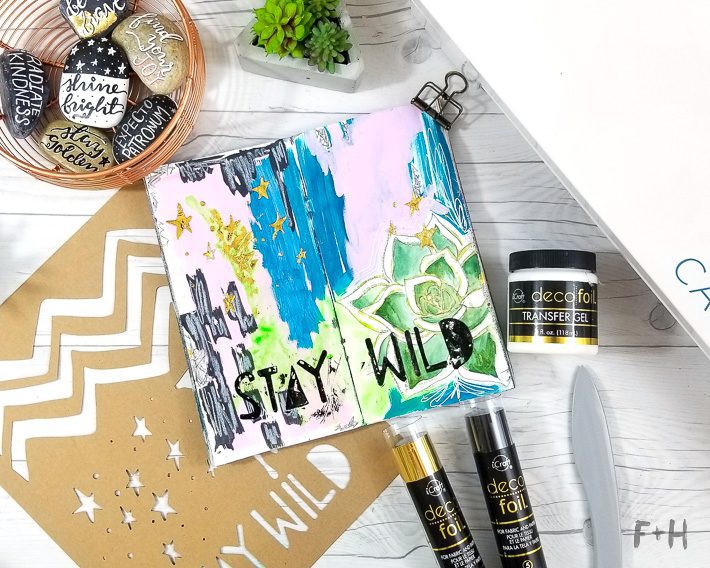
If you’re a letterer, then once you’ve used up the foil sheets they end up in the trash. However, I found that after using them on the paintbrush strokes, it left an inverted image in the foil sheet itself. That sheet was begging to be cut up and used as collage fodder for more pages! So you can get double use out of your foiling supplies by re-purposing the used sheets in other pages. Here’s the start of one:
I’m hoping to play around some more and find some new ways to incorporate foil printing to art journal pages. Every page will be decked out in shiny goodness! All the foil gods will shine down on me and illuminate my pages with glorious metallics. Too much? 😉