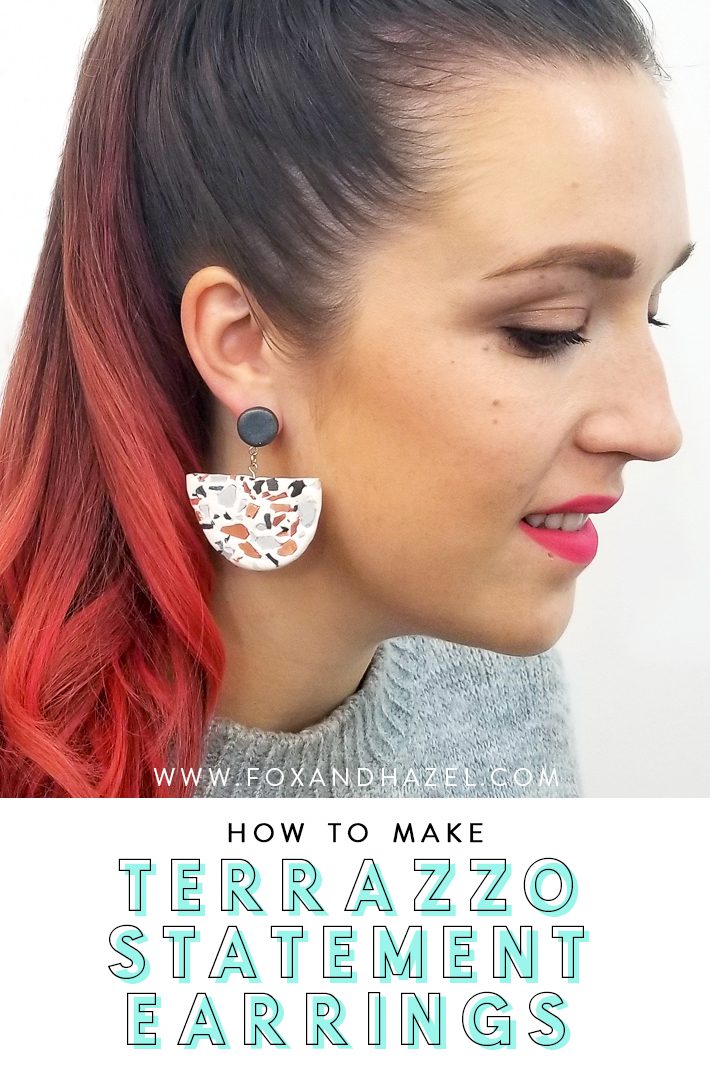
How to Make Faux Terrazzo Statement Earrings
Some links in this post are affiliate links to products I love!
I’ve been seeing a ton of terrazzo on Pinterest lately, and it’s so dang cute. I’ve always had an affinity for mosiacs, stonework and classic finishes. And terrazzo is basically the durable cousin of mosiac. Did you know terrazzo has a long history, but was notably in fashion during the Art Deco eras? And that the Hollywood Walk of Fame is all done in terrazzo? Pretty awesome stuff!
Creating real terrazzo is actually an art that requires a ton of muscle and skill, but creating faux terrazzo is totally do-able. I used polymer clay to turn terrazzo into some really fabulous statement earrings. I haven’t worn earrings all summer but now I’m trying to dress up more (instead of spending all day in yoga pants – mom life) and statement earrings are an easy addition. They dress up any outfit almost instantly and are the kind of self-expression I love. So let’s get on to making them!
Supplies Needed for Faux Terrazzo Statement Earrings:
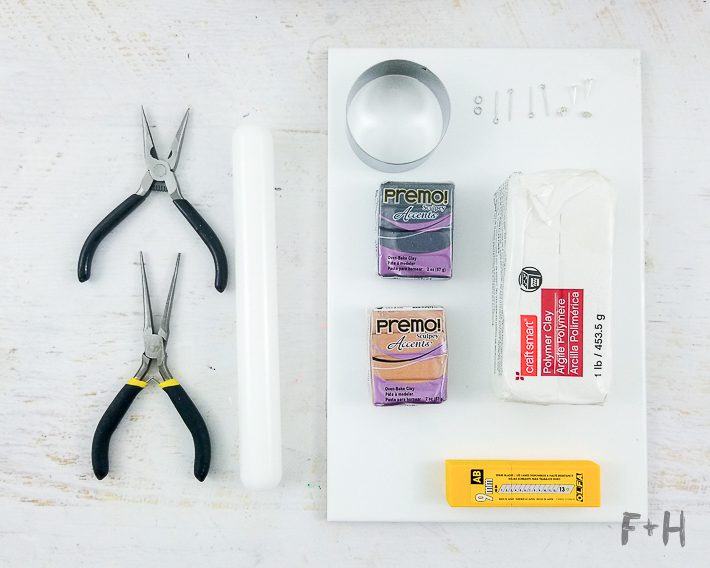
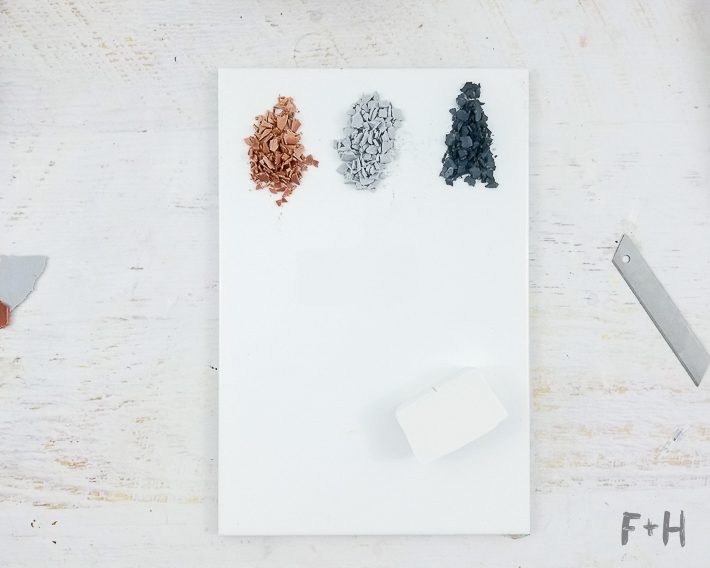
- White polymer clay
- 2-3 complimentary shades of poylmer clay (I used Sculpey Primo Accents in Copper, Twinkle Twinkle and Elephant Grey)
- Earring posts and backs
- 4mm jump rings
- Eye pins
- E-6000 Adhesive
- Ceramic tile (I picked mine up at my local home improvement store for less than $2)
- Clay knife blade (I used a knife blade for my retractable knife)
- Acrylic rolling pin
- Circle cookie cutter
- Needle nose or jewelry pliers
Step One:
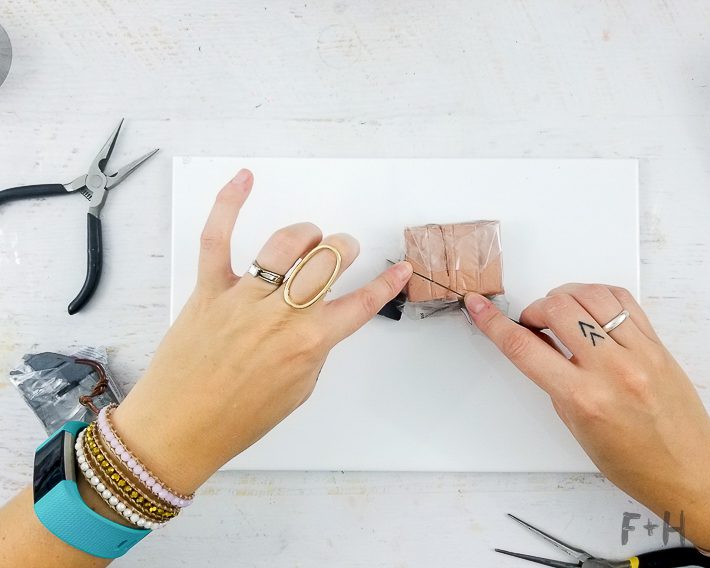
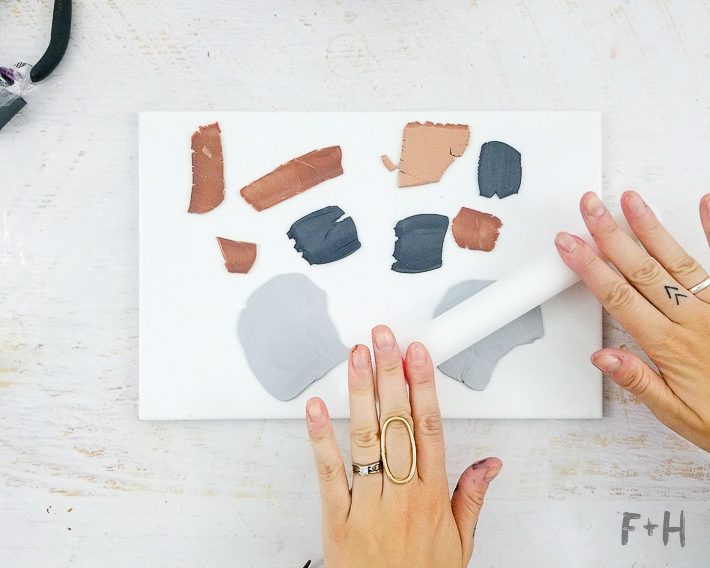
To create the small pebble-like pieces for the terrazzo, I rolled out some small thin pieces of the copper, black and grey polymer clay. I rolled them out to about 1/8″ thickness. There’s no need to be exact about this part at all since we will be crumbling these! Then I bake these sheets in the oven on my ceramic tile for 10 min at 250°F. I let the clay cool a bit before handling it.
Step Two:
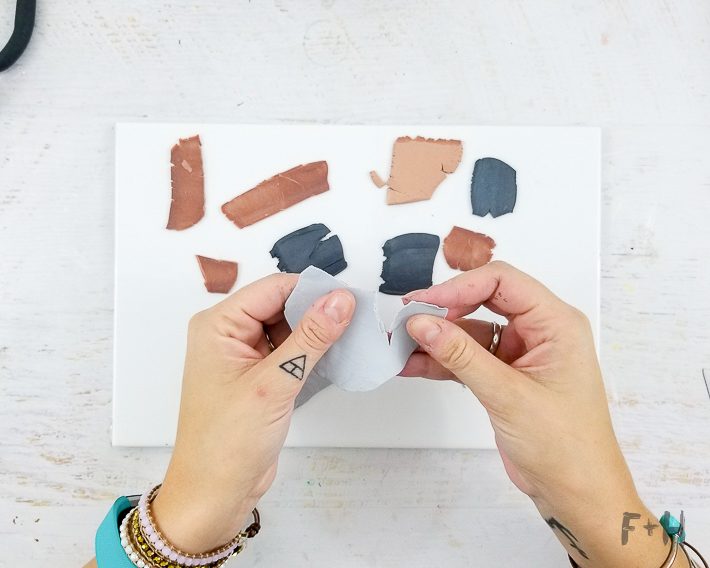
Next, I crumbled and tore up all my baked clay sheets into tiny pieces. These will serve as the “stones” in my faux terrazzo.
Step Three:
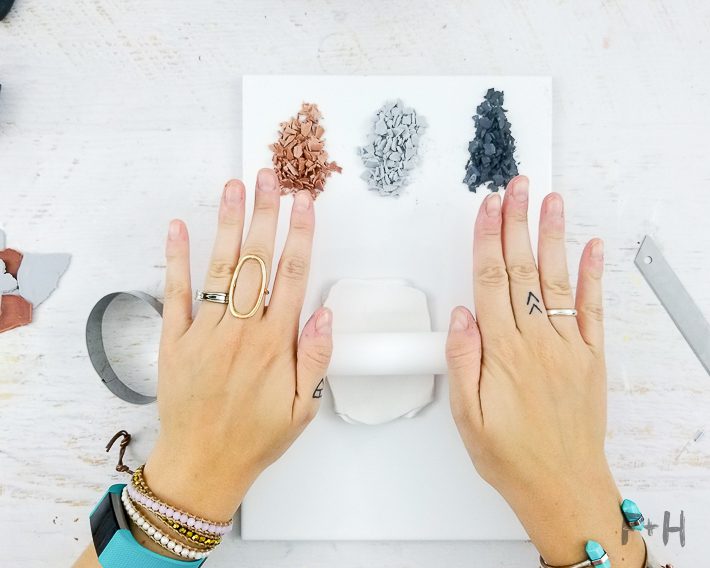
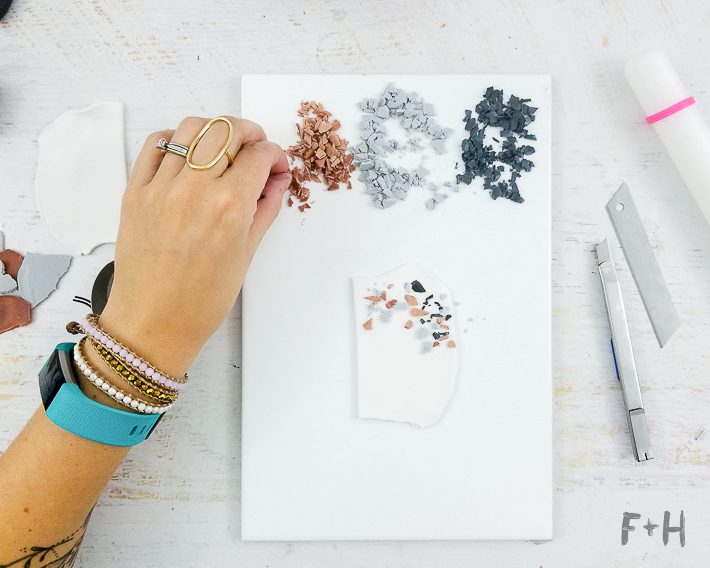
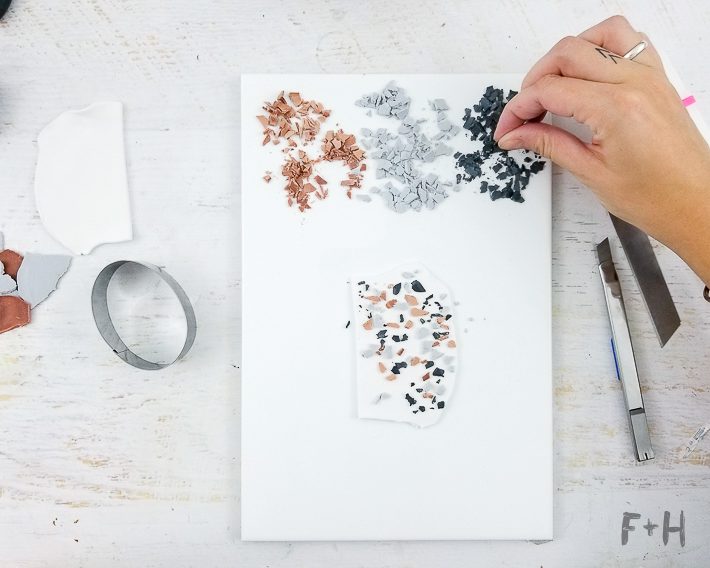
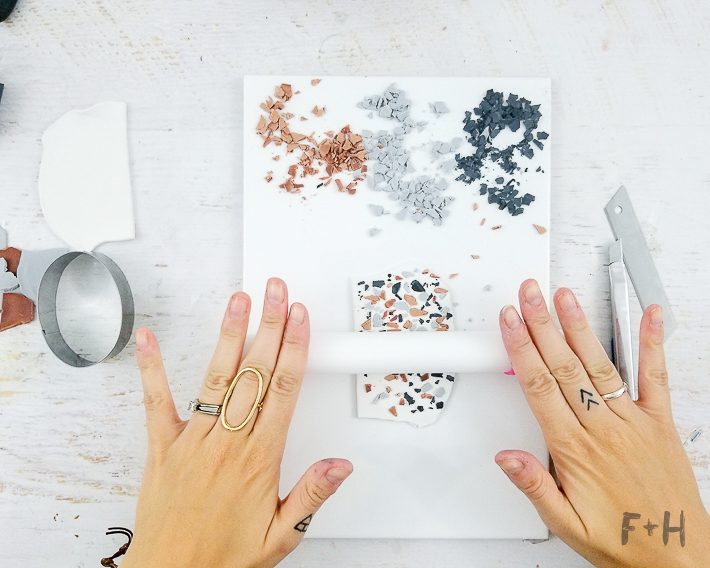
Now on to making the faux terrazzo! I rolled out some white clay until it was around 1/4″ thick with my acrylic rolling pin. I made sure it was big enough for my cookie cutter to fit. Next, I just started sprinkling the broken-up pieces of clay all over the white clay and gently pressing them in. What makes this look really great is getting lots of the little tiny crumbs in the clay. Fill it up as densely as you’d like. Once you have enough of the white clay covered in pieces, gently roll the clay again to help press all the little bits in. Tip: If you roll too aggressively it will cause the white clay to tear, and push the harder clay pieces too far into the clay. Roll with caution!
Step Four:
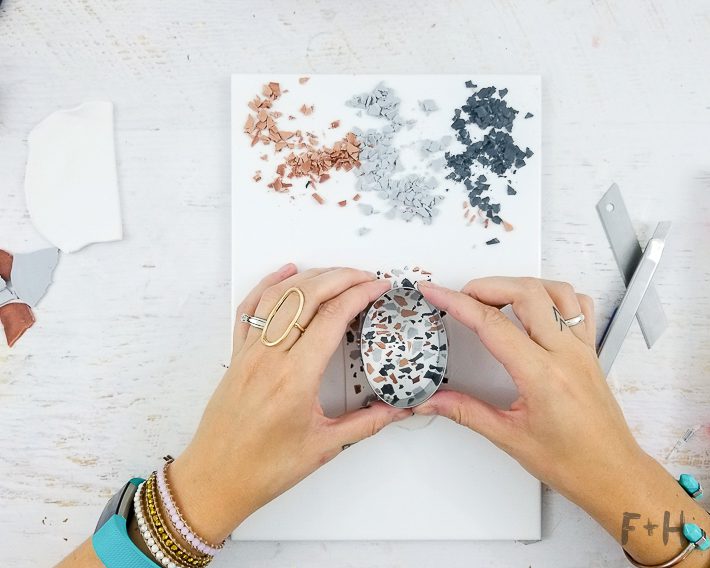
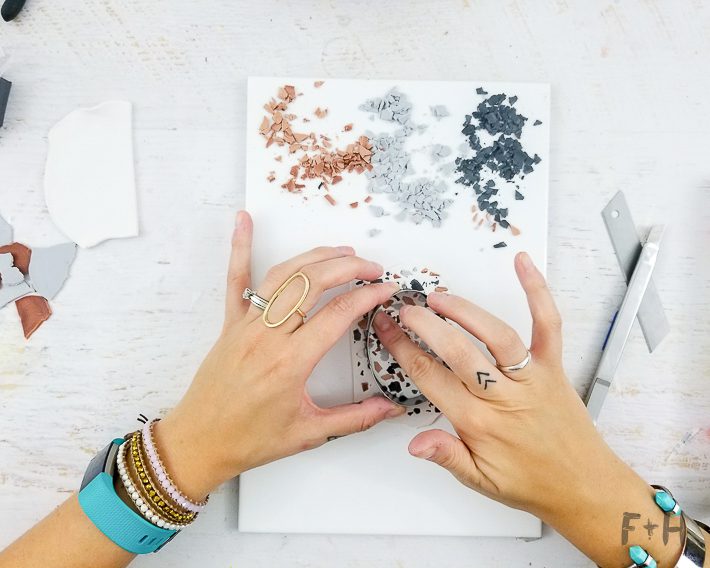
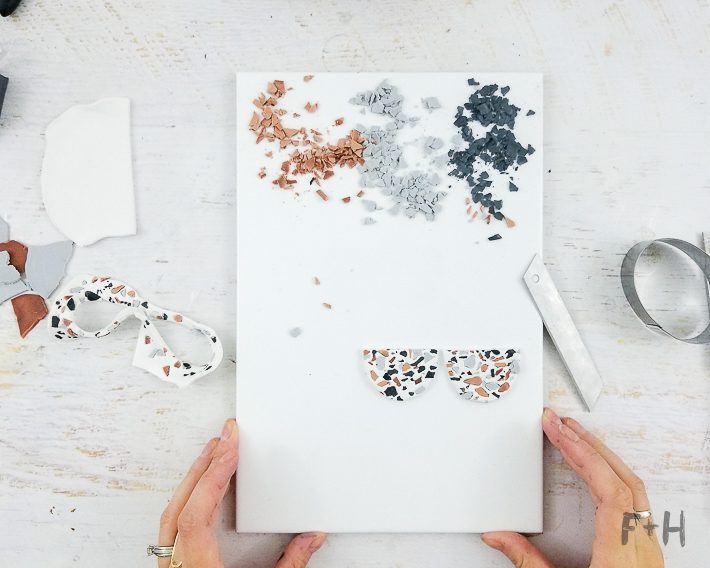
Next, I used my circle cookie cutter to cut out my earring shapes. This is a circle cutter, I promise! I just squished it a little bit to create more of an oval shape to create smaller half circles. This isn’t necessary if you use a smaller diameter circle cutter. When you cut the clay, the baked pieces will be a little tougher to get through, and it may cause the pieces to shift around in the clay. With the cookie cutter still in place, gently use your fingertips to smooth out any loose pieces of clay. Just make it all look great. Then cut your oval/circle shape in half to create two earrings!
Step Six:
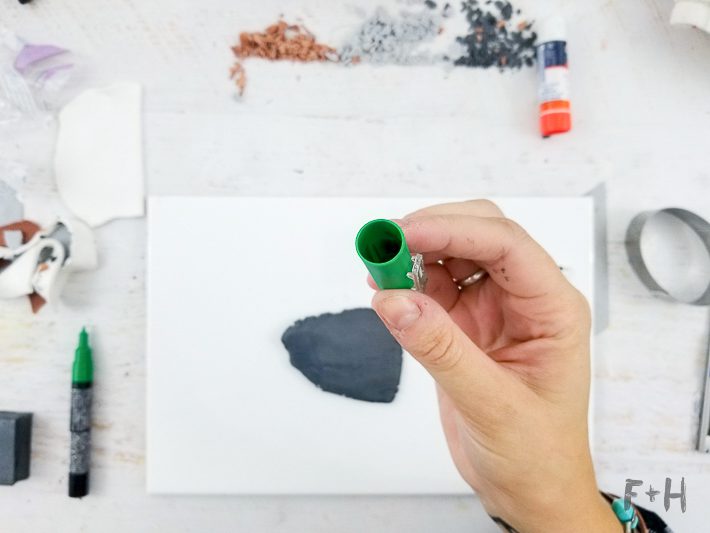
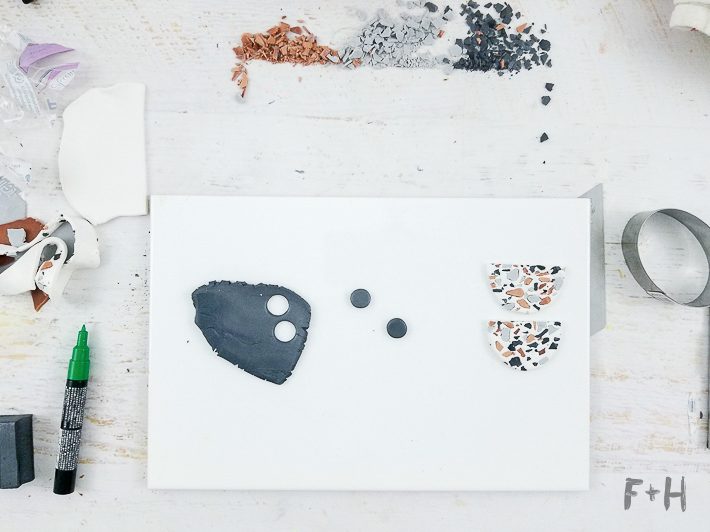
To create the stud portion of the earring, I used a lid from my paint marker to cut out two circles in the Twinkle Twinkle clay. Anything that will cut out a 1/2″ circle will work!
Step Seven:
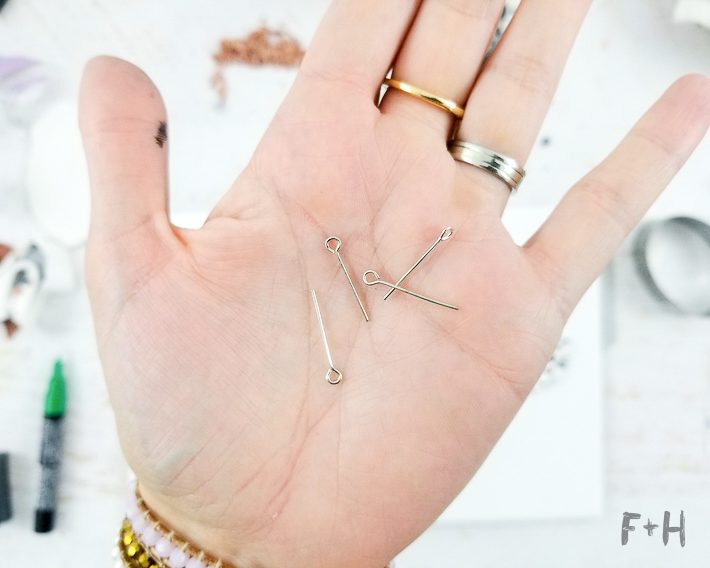
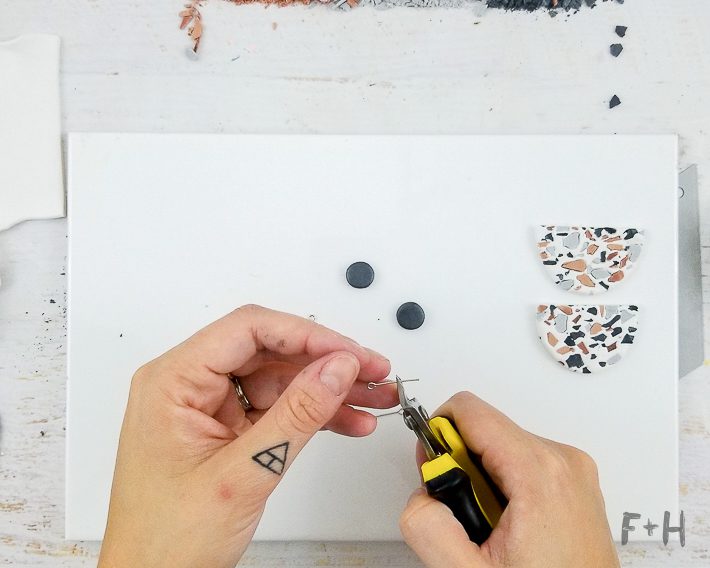

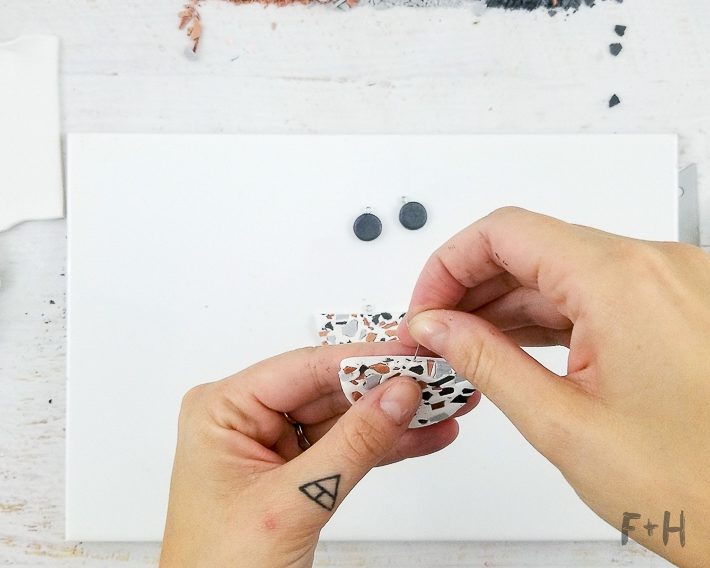
The last step before baking your hella amazing statement earrings is to insert the eye pins into each piece. These are how we will attach the lower half to the stud! I trimmed the eye pin for the studs a bit shorter since they were too long. Just gently insert them into the clay pieces while twisting to avoid squishing anything. Then bake them at 250°F for 15 minutes.
Step Eight:
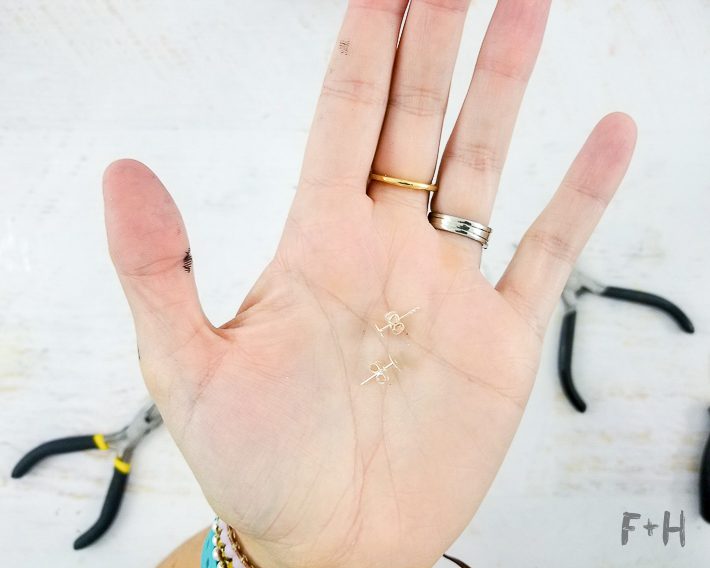

I apologize because I totally forgot to take photos of the next step! After baking everything, you will use a jump ring to attach the two pieces of the earring together. Basically open the jump ring and insert both the rings on the earrings pieces and close the jump ring. Make sure the earring pieces will hang the same direction when you attach them!
And lastly, use some E-6000 to glue the earring posts onto the back of the studs. And these badass faux terrazzo statement earrings are done!
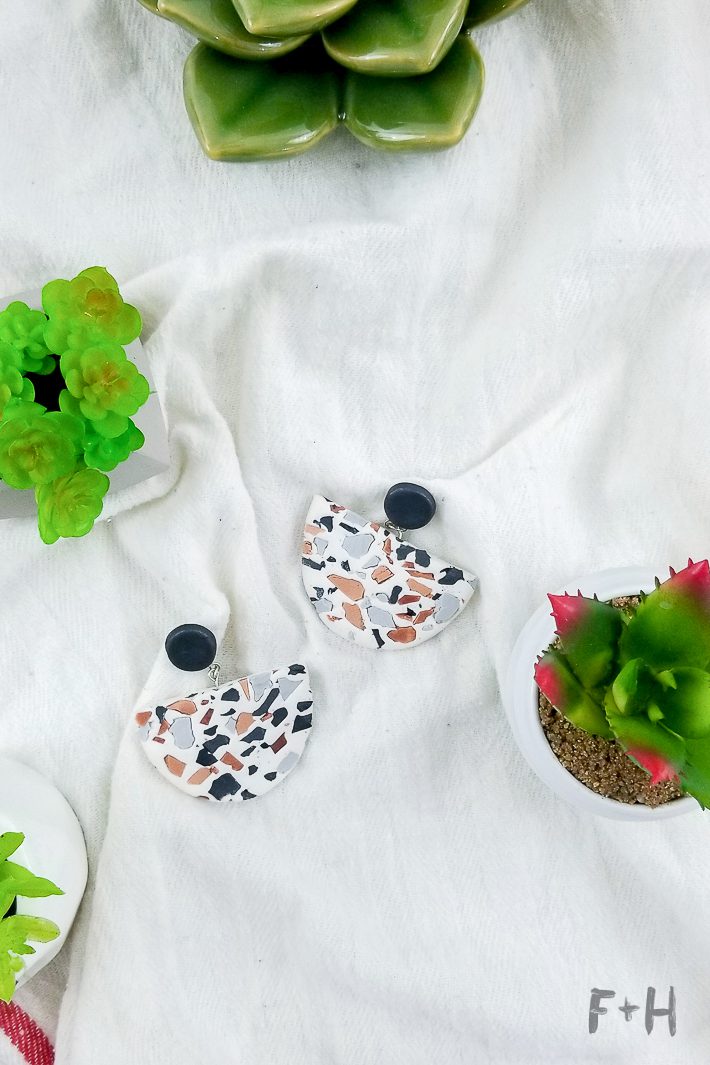
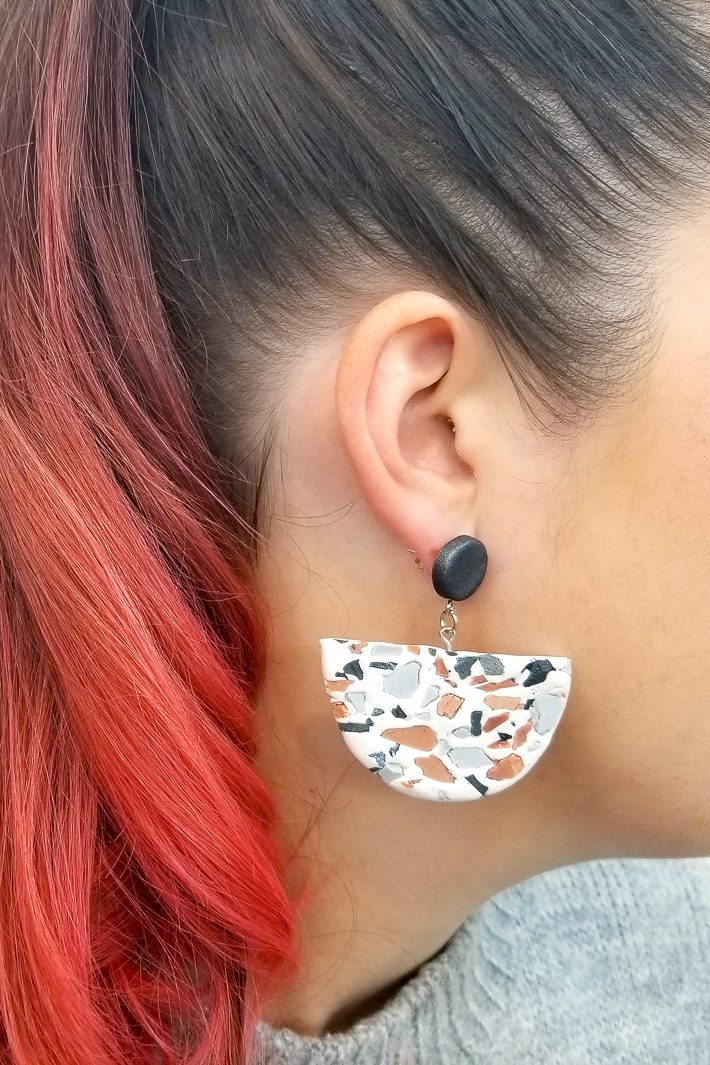
I absolutely LOVE how these statement earrings turned out! They already made their debut to school pick-up this week, and I got a couple of compliments on them! I call that a win. Let me know what you think about these faux terrazzo earrings in the comments!